Monday, October 20, 2014

Yosemite and iOS 8.1 ... Especially Handoff and Continuity

In anticipation of iOS 8.1, which I wrote about yesterday, I thought I'd download and install Yosemite. This was because, by all accounts, many of the features (exciting, new were the key phrases as I recall) of iOS 8.1 would work most effectively with Yosemite. We shall see how this worked in reality.
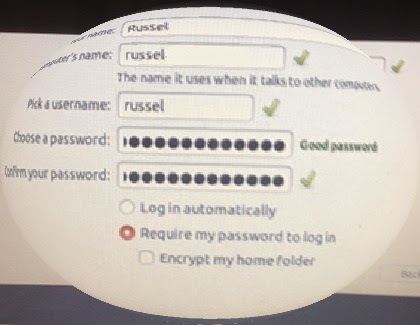
I set about by transferring my data and other files from my older Macbook (which couldn't run Yosemite) to a slightly newer Macbook Pro, which could.
After about an hour over wi-fi (because I'd foolishly used my ethernet cable elsewhere and my Firewire cable wasn't working) I got all my stuff across and began the slow process of upgrading and updating programs and the OS from the App Store.

This took several hours, as I had many updates and upgrades pending, but eventually everything happened quite smoothly and Apple's latest operating system -- Yosemite -- was ready to install on my Macbook Pro.
This process, too, was extremely smooth and painless and, after a wait of about 20 minutes, everything moved into place and I could begin checking, tweaking and generally setting things up to the way I wanted.
Yes, personalization is the name of the game for me and I intend to spend some time on this generally satisfying exercise.
I even went into the General System Preferences and ensured that the "Handoff" option to work between the Macbook Pro and my iCloud devices was allowed.
Now, on to iOS 8.1. As was generally expected, the update was available first thing this morning and I eagerly downloaded and installed it on both my iDevices. Everything took a reasonably short time (chiefly because the download was just over 60MB) over the air and the installation was, as usual, flawless.
Sadly, I have been unable to get the Handoff feature to work as it was promised -- mainly because, I suspect, I cannot find the option to enable "Handoff" on my iOS devices in the General Settings page there.
The info-sheet provided at the beginning of the download and installation process did include a clause right at the very end to the effect that all features may not be available in all countries.
I wonder if this is one of them.
Perhaps, some more online research may help (including the security link to the Support page (HT1222) provided.)
All else in the update/upgrade to iOS 8.1 was as I expected.


Sunday, October 19, 2014

Expectations, expectations ...

Hooray! It's Monday, October 20 and we can all look forward to new announcements, updates and upgrades from Apple! Oh, wait ... it's not yet October 20 in Australia and other parts of the world. This means those of us who are not in Cupertino will have to wait a few hours shy of 24 hours more (remember, Apple has not yet officially specified what time it will give us this release) before we can actually see what's what with -- for example -- iOS 8.1, Apple Pay, Handoff, etc...

Many sites are talking about people expecting (amongst other things) the return of the well-known (and liked) "Camera Roll". Another thing users are looking forward to is "Instant Hotspot" which, of course, in order to be turned on, requires a Mac running the recently released Yosemite.

Mail "Read" Count Not Updated on my iPhone 4S
All the above may be very well and great to have, no doubt. But what I, personally, am looking forward to with the expected release of iOS 8.1 are just two things:
  1. Improved battery life ... ever since iOS 8, battery performance has appeared to be not as good as before, possibly because of the new features which -- in order to be effective -- require to run themselves in the background. I don't know.
  2. Mail "Read" count to work again ... this has stopped working properly for me since iOS 8. Not all the time, mind you. It just happens on and off and I can't quite figure out why, or when it happens. No set pattern to its behavior and -- although not a big deal, it bugs me to have to remember that I do NOT have unread mail.
 
Those are my expectations ... for now. While I have earlier (with one of the other iOS releases) posted my battery issues on the Apple Forums, I have not done so regarding the Mail count. A search of the Forums reveal that similar issues have been around for quite some time, as this thread will reveal.

Hopefully Apple will be addressing these issues with the release of iOS 8.1. 
 

Friday, October 17, 2014

Even More on Ubuntu 14.04

I wrote yesterday about installing Ubuntu 14.04 as a dual-boot option on my Windows 7 laptop. I also posted a copy of this blog on Linked-In. An ex-colleague of mine read the Linked-In post and commented that he tried it on his system last week, but it did not work. I advised him to check things like available disk-space, RAM, and so on and also commented that he could try the "live" CD which is available as an option when one begins the Ubuntu installation.

On reflection, I realized that I had been using another flavor of Linux in 2009 or 2010 (Mandriva, which is RPM based,) but not Ubuntu, which is Debian based. Also, I had not completely written about the process for creating a dual-boot machine, (as this was not the point of my post). Thus I thought I'd outline those three initial steps as well for good measure. Here goes...

First of all, you should have a reasonable amount of spare disk-space to play around with. Also, your main operating system (in my case Windows 7) should not be endangered or compromised in any way, so care should be taken while rearranging/partitioning your hard drives. In my case, I had Windows 7 installed on drive C: plus a second partition -- drive D: -- to store data, files, etc. I planned to use drive D: as the "common-denominator" between Windows and Ubuntu, to share files if necessary. Windows 7's drive had about 130 GB only in total (didn't I mention this was a "test" laptop?) and drive D: was only using about 15 GB. Thus I couldn't spare too much space for Ubuntu. Also, my system had just about 4 GB of RAM to play around with. Hence I was forced to allocate just 15 GB to Ubuntu.

I opened up my Windows' Disk Management Utility (Right-Click on Computer, chose "Manage") and then selected C: I then chose to "Shrink" the drive, leaving about 15 GB of "Unallocated Space."

This is quite important ... don't play around with Disk Management Utility unless you are confident that you know what you're doing. Else your system may be rendered inoperable and, unless you have a recovery tool, you're in for some headaches later on.

I left the 15 GB "Unallocated Space" as-is, for I planned to point Ubuntu here, upon installation. (As it turned out, I didn't need to do anything because Ubuntu is now intelligent enough to apparently look for this space and install itself here, without compromising any existing drives or data. Cool!)

I next logged out of Windows, inserted the Ubuntu boot USB (which I had earlier created from the downloaded ISO image), chose the option to boot from this and, as I wrote yesterday, everything went swimmingly.

Hope this helps my ex-colleague, if he's reading this (I plan to copy this to Linked-In as well, just in case) and anyone else who may have a similar experience.

Thursday, October 16, 2014

More about Ubuntu 14.04

 Well, I finished toying with the idea I mentioned yesterday. Took the plunge, removed Ubuntu from my VirtualBox environment and installed it as a dual-boot on my Windows-7 laptop!

All went as swimmingly as the VirtualBox from Oracle installation. It found my location (which means it found my internet connection and GPS worked) and my sound-hardware right off -- no need to point it anywhere as in the installation I remember from all those years ago.

 Once I'd completed almost all the options of installation (successfully), it asked me to choose a computer name, username and password, which I did (quite egoistically, as you can see!), but chose the option to "Require my password to log in" rather than the default "Log in automatically." That's just me being suspiciously paranoid, (or paranoically suspicious -- if there is such a word!)


Having finally installed updates from the internet and finished "cleaning up", the system then asked me to reboot, signifying another successful setup!

 I logged in after that, downloaded and installed the available anti-virus (Clam) from the Software Centre, updated a couple more programs, and there you have it. A fully functional (did I mention "free") and reasonably secure operating system.

I did notice, though,  the same up-front legal declaration similar to a declaration regarding Windows 10 Tech Preview. This one indicated that, if one chose to search through it's "Dash" option for locally-installed programs or from the internet, one's keystrokes would be logged and sent back to the developers for test purposes. This default, however, could be turned off in the Privacy settings, so I promptly did so.


Of course, this installation is just for my own test-purposes, so I'm not going to key in any security or privacy stuff. So I'll go ahead and explore some more...

Wednesday, October 15, 2014

 I'm sure this must have already been documented elsewhere, but -- having written about my experience running Windows 10 Tech Preview in a virtual environment the other day -- I thought I'd try a similar exercise installing Ubuntu on my old Windows 7 laptop, and document it for what it's worth. Here goes ...
 First off, I downloaded the necessary files to make this happen (from Oracle) and then went through the process of installing VirtualBox first. That done, I took the plunge and ran the Ubuntu executable (again, without backing up anything ... too lazy!)
VirtualBox had already made the Type and Version choices for me so I left those as they were and just typed in the name box for the virtual machine. I also stuck with the paltry 512MB RAM, as suggested and clicked Next, then chose to "Create a virtual hard drive now" from the next screen, and chose VDI as the hard drive type from the following screen. I followed these choices with the "Dynamically allocated" option, because I had a bit of free space available and, on the next screen I stuck with the default options. That was it. I just needed to click the green Start arrow and installing Ubuntu was just a few clicks away...
I pointed to the ISO location and VirtualBox launched it without a hitch. Ubuntu (or VirtualBox -- I don't know) appears to have some issue initializing my SMBus base address, but it breezed smoothly on, usin 0xaddr. I wasn't worried because, if anything went wrong I could always wipe the machine and start over.
 
I continued to stick to the default options, except where I was asked to make a choice (such as downloading updates, skipping languages, etc...) and Ubuntu was up and running.
 The whole process took little under an hour, unlike the 45 minutes it took yesterday with Windows 10 Tech Preview on my Apple MacBook. But this was definitely because of the low RAM I allocated. Also, as my laptop has a total of only 4GB RAM, I was quite happy to wait.
I must say I was quite impressed with the way Ubuntu has improved over the years (I last used it in 2008) and am now toying with the idea of making my laptop into a dual-boot machine. Let's see how far that thought takes me ...

Tuesday, October 14, 2014

Keylogger???
Having downloaded and installed in a VirtualBox environment on my MacBook (yesterday -- see this post), I was a wee bit concerned to learn that -- allegedly -- Microsoft is tracking me and collecting all my data. I turned to the internet to verify this and got a whole host of posts and blogs from people and forums with similar concerns. However, as I learned on reading various posts, including the hard-hitting one from The Register, MS has been open and right upfront about this. In fact, data collection from its "Insiders" is the whole point of Windows 10 Technical Preview.

Nevertheless, people are concerned, and some allege that Windows 10 has a "built-in keylogger" which logs every keystroke we type. According to MS, they indicated that they would be collecting data way up front in the User Agreement. Here's a quote attributed to one of their spokespersons:

"Users who ... opt-in to the Windows 10 Technical Preview are choosing to provide data and feedback that will help shape the best Windows experience for our customers."

The Windows Insider Program's Terms of Use includes this statement:

" * enter text, we may collect typed characters and use them for purposes such as improving autocomplete and spell-check features."

And this clause, possibly, is what triggered the furore.

MS, however, doesn't specifically state which data it collects (one assumes that all typed information, file interaction, etc., is being logged for research purposes) but, this is a "Preview" OS (not even beta, for goodness' sake!) If you use it to conduct internet banking and write personal emails,  log into your private Social sites with your personal passwords, then you have only yourself to blame in case this collected data is hacked on its way to MS' servers -- however unlikely that may be.

Monday, October 13, 2014

Windows 10 Tech Preview on my MacBook!


This morning I read a very informative post on Macworld which, in a nutshell, details how to install Windows 10 Technical Preview on a Mac. I was intrigued by this for, as you may recall, I'd earlier posted here that I was unable to install it on a laptop PC running Windows 7. The writer details two methods -- one using Apple’s built-in Boot Camp software and the other (safer) method as a virtual machine inside an OS X program.
 

I decided to give it a shot on my old, trust, Macbook 2008 (with only 4GB RAM in total) and opted for the (safer) method of VirtualBox from Oracle.

I took a huge risk and did not back up my Mac at all. Even though Windows 10 is reported to be experimental software, I just didn't want to take the time (just bone lazy, I guess.)

To cut a long story short, my experience too (as with the Macworld poster,) was issue-free. I installed Windows 10 Technical Preview on my early 2008 MacBook with just 4GB of RAM. I also only allocated a single paltry GB to VirtualBox for the Preview. Because of this probably, it took a long time to install (nearly 45 minutes -- with the last "Almost ready" screen lasting for 8 minutes.) Nevertheless, after verifying my email address, it started and ran understandably jerkily but good enough for me to test. (I was interested, though, to see that the "Welcome" link on my desktop worked quite quickly.)

I hope this exercise doesn't do anything dreadful to my old Macbook, as I've gotten quite fond of it over the years (it's my only Mac!) and wouldn't like to send it to that great Macyard in the sky anytime soon.